5 Common Diamond Painting Mistakes & How to Avoid Them
Are you making these 5 common diamond painting mistakes without even realising it? Many beginners and even experienced crafters unknowingly fall into common traps that can ruin their artwork—causing loose diamonds, faded adhesive, and uneven designs. Small errors can lead to frustration and wasted materials, from choosing the wrong canvas size to forgetting to seal the final piece. But don’t worry! This guide will show you how to fix these common diamond painting mistakes and make your artwork last longer. Follow these essential diamond painting tips to keep your drills secure, your canvas flawless, and your experience frustration-free!
What is Diamond Painting?
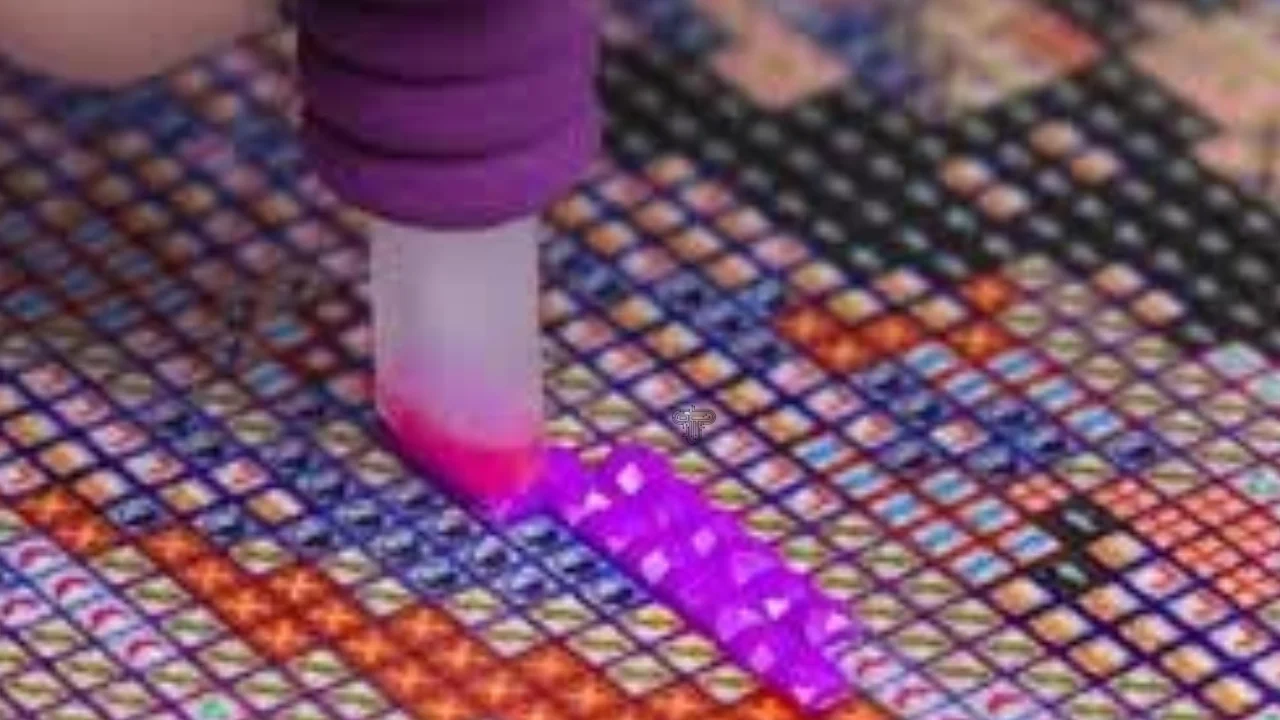
Paint With Diamonds is a therapeutic, creative craft that combines the relaxation of paint-by-numbers with the shimmering beauty of mosaic art. Instead of using paint, crafters apply tiny, colourful resin drills (diamonds) onto a self-adhesive canvas, following a printed pattern with symbol guides. These drills come in two shapes—round and square—each offering a unique finish: round drills are easier to apply and create a softer look, while square drills fit together seamlessly for a fuller, mosaic effect.
Originally invented in 2010 and gaining popularity worldwide, diamond art painting is loved for its stress-relieving benefits, making it a perfect hobby for beginners and advanced crafters. There’s a diamond painting kit for every skill level with thousands of designs available, from simple patterns to intricate landscapes and portraits. Whether crafting for relaxation, home décor, or a thoughtful handmade gift, painting with diamonds offers a satisfying, sparkling masterpiece at the end of every project!
Essential Tools & Materials You Need for Diamond Painting
Before you start your diamond painting journey, having the right tools and materials is crucial for a smooth and enjoyable experience. Whether a beginner or a seasoned crafter, these essentials will help you create a flawless diamond painting masterpiece without frustration.
1. Diamond Painting Kit (The Basics)
Every diamond painting kit includes the following must-have materials:
- Self-Adhesive Canvas – A pre-printed canvas with a symbol guide and a sticky surface to hold the drills in place.
- Diamond Drills (Resin Beads) – Tiny, colourful resin diamonds that come in two shapes:
- Round Diamonds – Easier to pick up and apply, ideal for beginners.
- Square Diamonds – Fit together seamlessly, providing a more complete and polished look.
- Applicator Pen – A special pen tool used to precisely pick up and place diamonds on the canvas.
- Wax Pad (or Wax Clay) – Helps the applicator pen grip the diamonds efficiently.
- Diamond Tray – Holds small batches of diamonds for easy sorting and picking.
2. Optional but Useful Accessories
While not included in every kit, these tools can make your diamond painting process easier and more organised:
- Light Pad – Illuminates the canvas for better visibility, especially for tiny symbols or dark-coloured drills.
- Storage Containers & Zip Bags – Essential for sorting and organising different colours to avoid mix-ups.
- Rolling Pin or Brayer – Ensures all diamonds are firmly pressed for a long-lasting finish.
- Tweezers – Useful for adjusting misplaced diamonds, especially for square drills that require precise alignment.
- Sealer (Glue or Spray Sealant) – Helps lock diamonds in place permanently, preventing them from falling off over time.
Having the right diamond painting tools and accessories ensures a stress-free crafting experience and helps you achieve professional-looking results. Whether you’re just starting or upgrading your setup, investing in the right materials can make a huge difference in how enjoyable and effortless your project feels!

How to Set Up Your Diamond Painting Workspace
Creating a comfortable and organised workspace is essential for a stress-free diamond painting experience. A well-prepared area helps prevent misplaced drills, sticky messes, and eye strain, ensuring you enjoy your crafting session from start to finish. Here’s how to set up the perfect diamond painting workspace for maximum efficiency and enjoyment.
1. Choose a Flat, Well-Lit Surface
Your workspace should be stable, spacious, and clutter-free to avoid losing tiny diamond drills. A flat table or desk is ideal, ensuring the canvas is flat without creases.
Tip: If your canvas curls up, flatten it by placing heavy books on the corners for a few hours.
Best Workspaces:
- Large desks or craft tables
- Kitchen/dining tables
- Portable lap desks (for couch or bed setups)
2. Get the Right Lighting
Working in poor lighting can make it hard to see symbol details and cause eye strain, leading to mistakes. Using bright, direct lighting ensures better visibility and helps reduce fatigue during long crafting sessions.
Best Lighting Options:
- LED Desk Lamps – Bright and adjustable, perfect for precise work.
- Light Pad – Placed under the canvas, making symbols clearer and easier to read.
- Natural Daylight – If working near a window, ensure the light isn’t too harsh to avoid glare.
3. Organize Your Diamond Drills
Unorganised diamonds = lost colours and frustration. Sorting your resin drills before starting makes the process much smoother.
Best Ways to Organize Diamond Drills:
- Storage Containers – Small, divided boxes help keep colours separate and easily accessible.
- Zip Bags with Labels – Perfect for temporary storage if you don’t have a dedicated container.
- Tray System – Use multiple trays for frequently used colours to avoid constant swapping.
Tip: Label each colour with its DMC code for quick reference!
4. Keep Your Tools Within Reach
Nothing is more annoying than misplacing your applicator pen or wax mid-session. Keep all tools in a small container or organiser so everything is within arm’s reach.
Essential Tools to Keep Handy:
- Applicator Pen & Wax Pad (for smooth placement)
- Tweezers (for fixing misplaced drills)
- Tray for Diamonds (to prevent spills)
- Lint Roller or Soft Cloth (to remove dust from the canvas)
5. Protect Your Canvas & Workspace
Your canvas’s adhesive surface can easily collect dust, pet hair and debris, affecting drill placement. To keep it clean:
Canvas Protection Tips:
- Peel Back Only Small Sections – Keeps the rest of the adhesive fresh.
- Use a Cover Sheet or Parchment Paper – Prevents dirt buildup when not in use.
- Avoid Eating or Drinking Nearby – Spills can ruin the sticky surface.
Tip: If your canvas loses stickiness, gently wipe it with a baby wipe or use a tacky glue to refresh the adhesive.
A well-organized, customised diamond painting workspace can significantly impact your crafting experience. By ensuring good lighting, a flat surface, proper tool organisation, and canvas protection, you’ll avoid frustration and enjoy every step of your creative journey! Ready to get started? Organise your space today and bring your diamond art to life!

5 Common Diamond Painting Mistakes To Avoid
Even the most enthusiastic diamond painters can encounter frustrating issues affecting the final masterpiece. From losing diamonds to ruining the adhesive, small mistakes can quickly turn an enjoyable craft into a headache. Below are the five most common diamond painting mistakes, why they happen, and how to fix them so your artwork stays flawless!
1. Peeling Off the Canvas Cover Too Soon
Many crafters remove the entire plastic cover before starting, exposing the sticky adhesive to air, dust, and debris. This can cause the canvas to lose its stickiness, making it difficult for the diamonds to adhere properly.
How to Fix It:
- Peel back only a small section at a time as you work.
- If the adhesive loses its grip, use a baby wipe to gently clean the surface or apply a thin layer of tacky glue.
- Store unfinished paintings flat and covered to protect the adhesive.
Pro Tip: Never fold the canvas; it can create creases that are hard to smooth out!
2. Not Organizing Diamond Drills Properly
Many beginners leave diamonds in their original plastic bags without labelling them. This results in mixed colours, wasting time matching the right drill to the right symbol.
How to Fix It:
- Use a labelled storage container with compartments for each colour.
- Keep your DMC-coded numbers visible so you can easily find the right colour.
- Work with one colour at a time to prevent mix-ups.
Pro Tip: If diamonds fall on the floor, use a lint roller or tweezers to pick them up easily!
3. Applying Too Much Pressure When Placing Diamonds
Pressing too hard on diamond drills can cause the adhesive to flatten, making it harder for the diamonds to stay in place. It may also lead to misaligned or popping drills.
How to Fix It:
- Gently press the diamonds down rather than forcing them.
- After finishing your painting, use a rolling pin or brayer to evenly secure the drills without damaging the surface.
- Ensure the applicator pen tip is clean so it picks up diamonds correctly.
Pro Tip: If diamonds pop off even after sealing, apply a light coat of clear sealant to lock them in place.
4. Forgetting to Seal the Finished Painting
Many crafters assume diamond paintings don’t need sealing, but diamonds may loosen over time without protection.
How to Fix It:
- Use a brush-on or spray sealant to secure the diamonds.
- Make sure the painting is clean and dust-free before applying sealant.
- If framing your painting, use a glass-free frame to keep the sparkle intact.
Pro Tip: If you don’t want glue, a simple rolling pin press can also help secure diamonds in place!
5. Choosing the Wrong Canvas Size as a Beginner
Many first-time crafters choose large, highly detailed canvases that take weeks or months to complete, leading to frustration and burnout.
How to Fix It:
- If you’re new to diamond painting, start with a small or medium-sized canvas (20×20 cm to 30×40 cm).
- Choose simpler designs with fewer colour variations to practice your technique.
- Gradually move to larger or full-drill paintings once you’re confident.
Pro Tip: Full-drill canvases (where the entire surface is covered with diamonds) take longer to complete than partial-drill paintings, which only have specific areas requiring diamonds.
Avoiding these common diamond painting mistakes will help you work faster, prevent frustration, and create stunning results. By keeping your canvas protected, organising your drills, applying the right pressure, sealing your artwork and choosing the right size, you can enjoy a smooth, stress-free crafting experience.
Tech Blaster
Shop Premium Diamond Painting Kits at Paint With Diamonds!
Looking for premium diamond painting kits that sparkle with vibrant colors and top-notch quality? At Paint With Diamonds, we offer exclusive designs, durable adhesive canvases, and all the tools you need to create a stunning masterpiece. Whether you’re a beginner or an expert, our collection has something for everyone. Shop now and bring your creativity to life with the best diamond painting kits online!